The article is from https://support.xilinx.com/s/article/1137153?language=en_US
TITLE
AXI Basics 6 - Introduction to AXI4-Lite in Vitis HLS
AUTHOR
aoifem
LAST PUBLISHED DATE
10/13/2021, 11:01 AM
BODY
Introduction:
In this tutorial we will explore the basics of how to create a custom IP with an AXI4-Lite interface in Vitis HLS. If you are a complete beginner to AXI and would like to become familiar with the essential terms and background, please see the tutorial AXI Basics 1.
Note: The process for creating an IP with AXI in Vivado HLS is different to the process for Vitis HLS. If you wish to create an AXI IP in Vivado HLS, please refer to UG902.
AXI4-Lite is a basic AXI communication protocol. It is often used for simple, low-throughput memory-mapped communication (for example, to and from control and status registers).
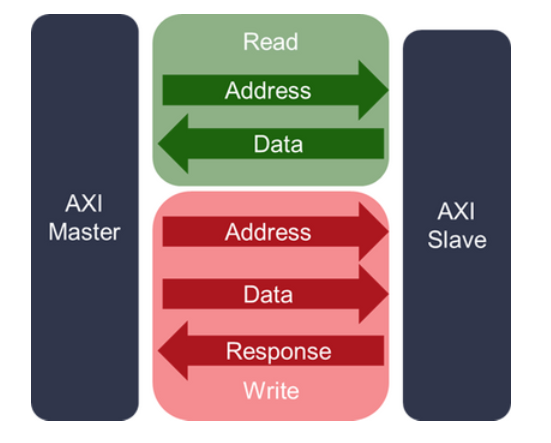
The AXI4-Lite Interface can be read only (only includes the 2 Read channels) or write only (only includes the 3 Write channels), as seen in the diagram above.
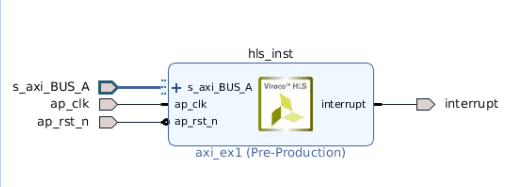
In this tutorial, we are going to create the following IP. s_axi_BUS_A is our AXI4-Lite interface:
By the end of this tutorial, you will
- Understand the basics of creating an AXI4-Lite interface in Vitis HLS.
- Learn about pragmas in Vitis HLS, which define the AXI interface being used.
Opening the AXI-Lite Example Design
An example design for the AXI4-lite is provided in Vitis HLS. To open the example design for the AXI-Lite, follow these steps:
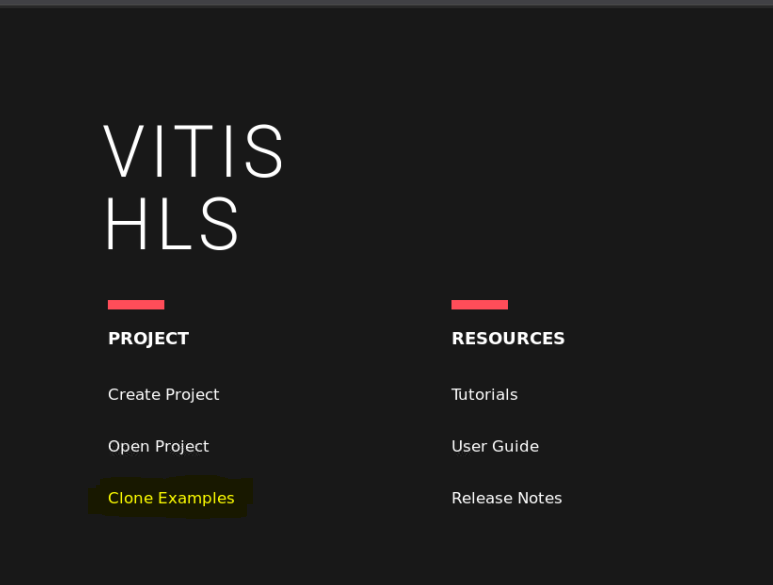
- Open the Vitis HLS GUI. From the opening screen, select the ‘Clone Examples’ option to copy Vitis HLS Example designs from GitHub:
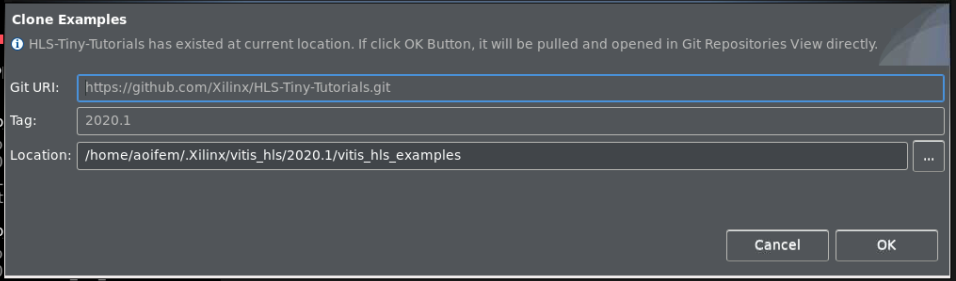
- In the pop-up tab, select the location you wish to place the examples, and select OK:
- In the next screen, the example designs will be displayed in the bottom left corner. Select the arrow beside ‘HLS Tiny Tutorials’ and ‘Working Tree’ in order to view all of the examples available.
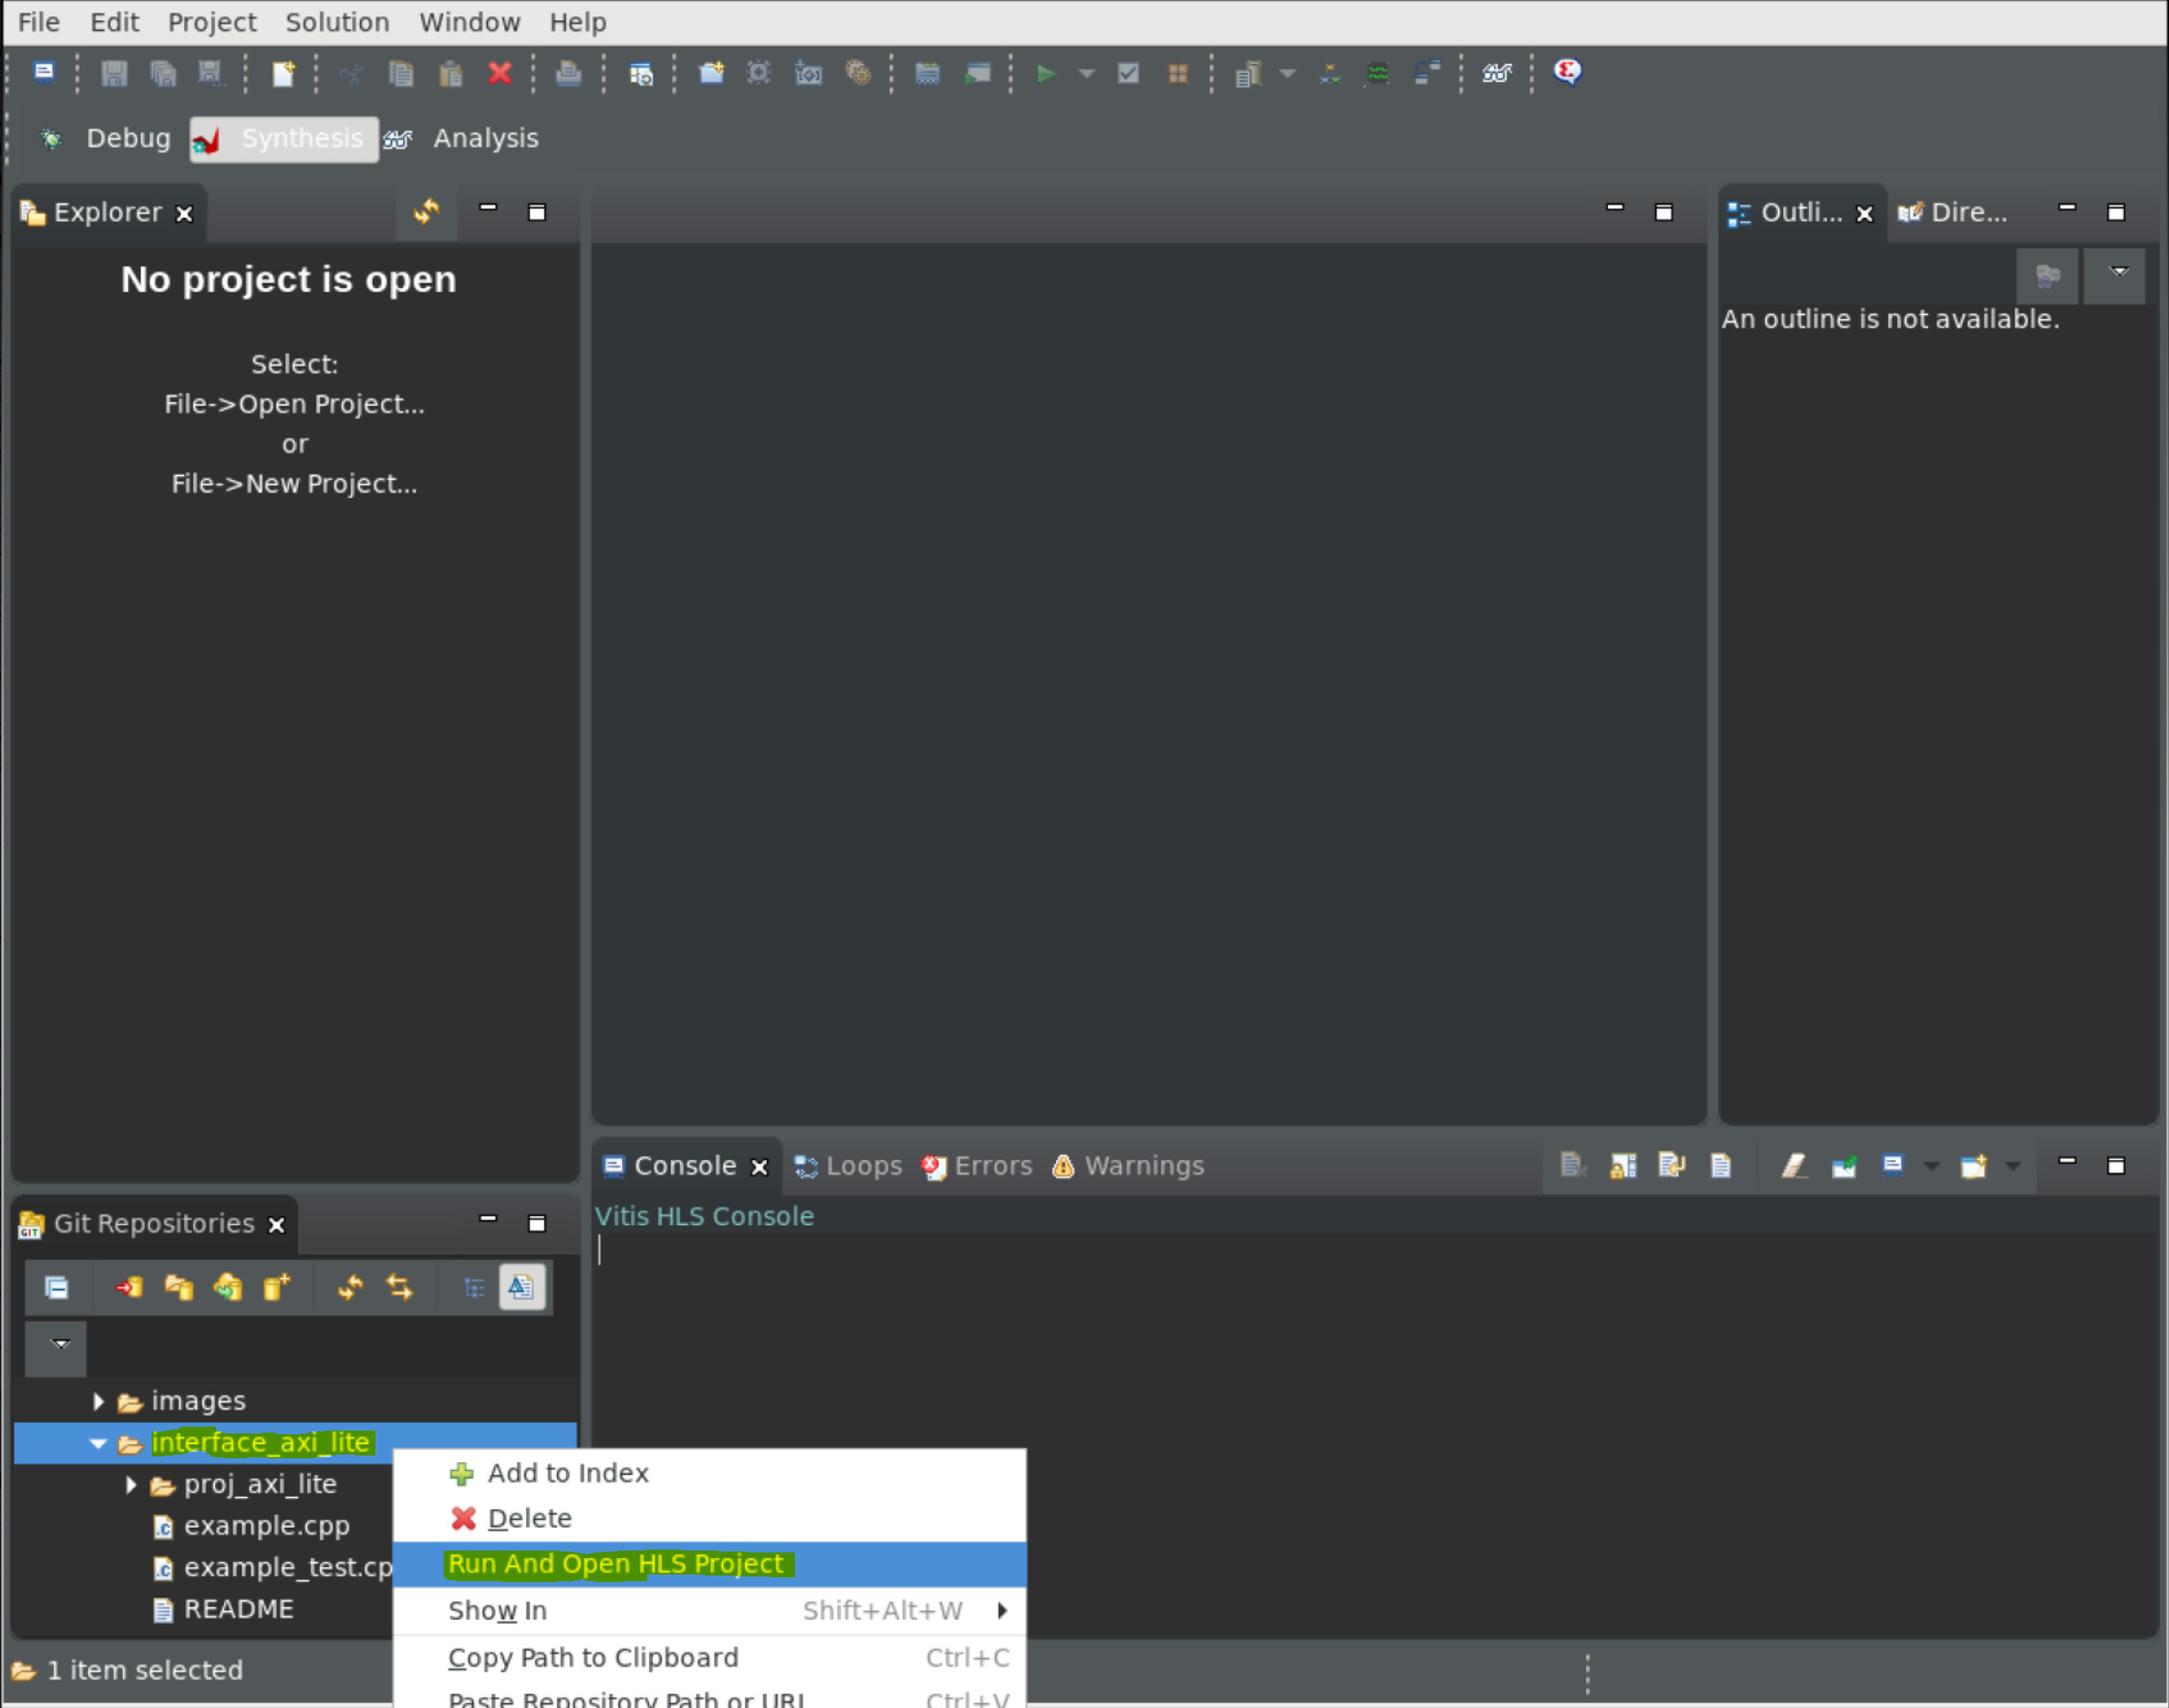
- Scroll down until you find the example for interface_axi_lite. Right-click on the folder name, and select the option ‘Run and Open HLS Project’.
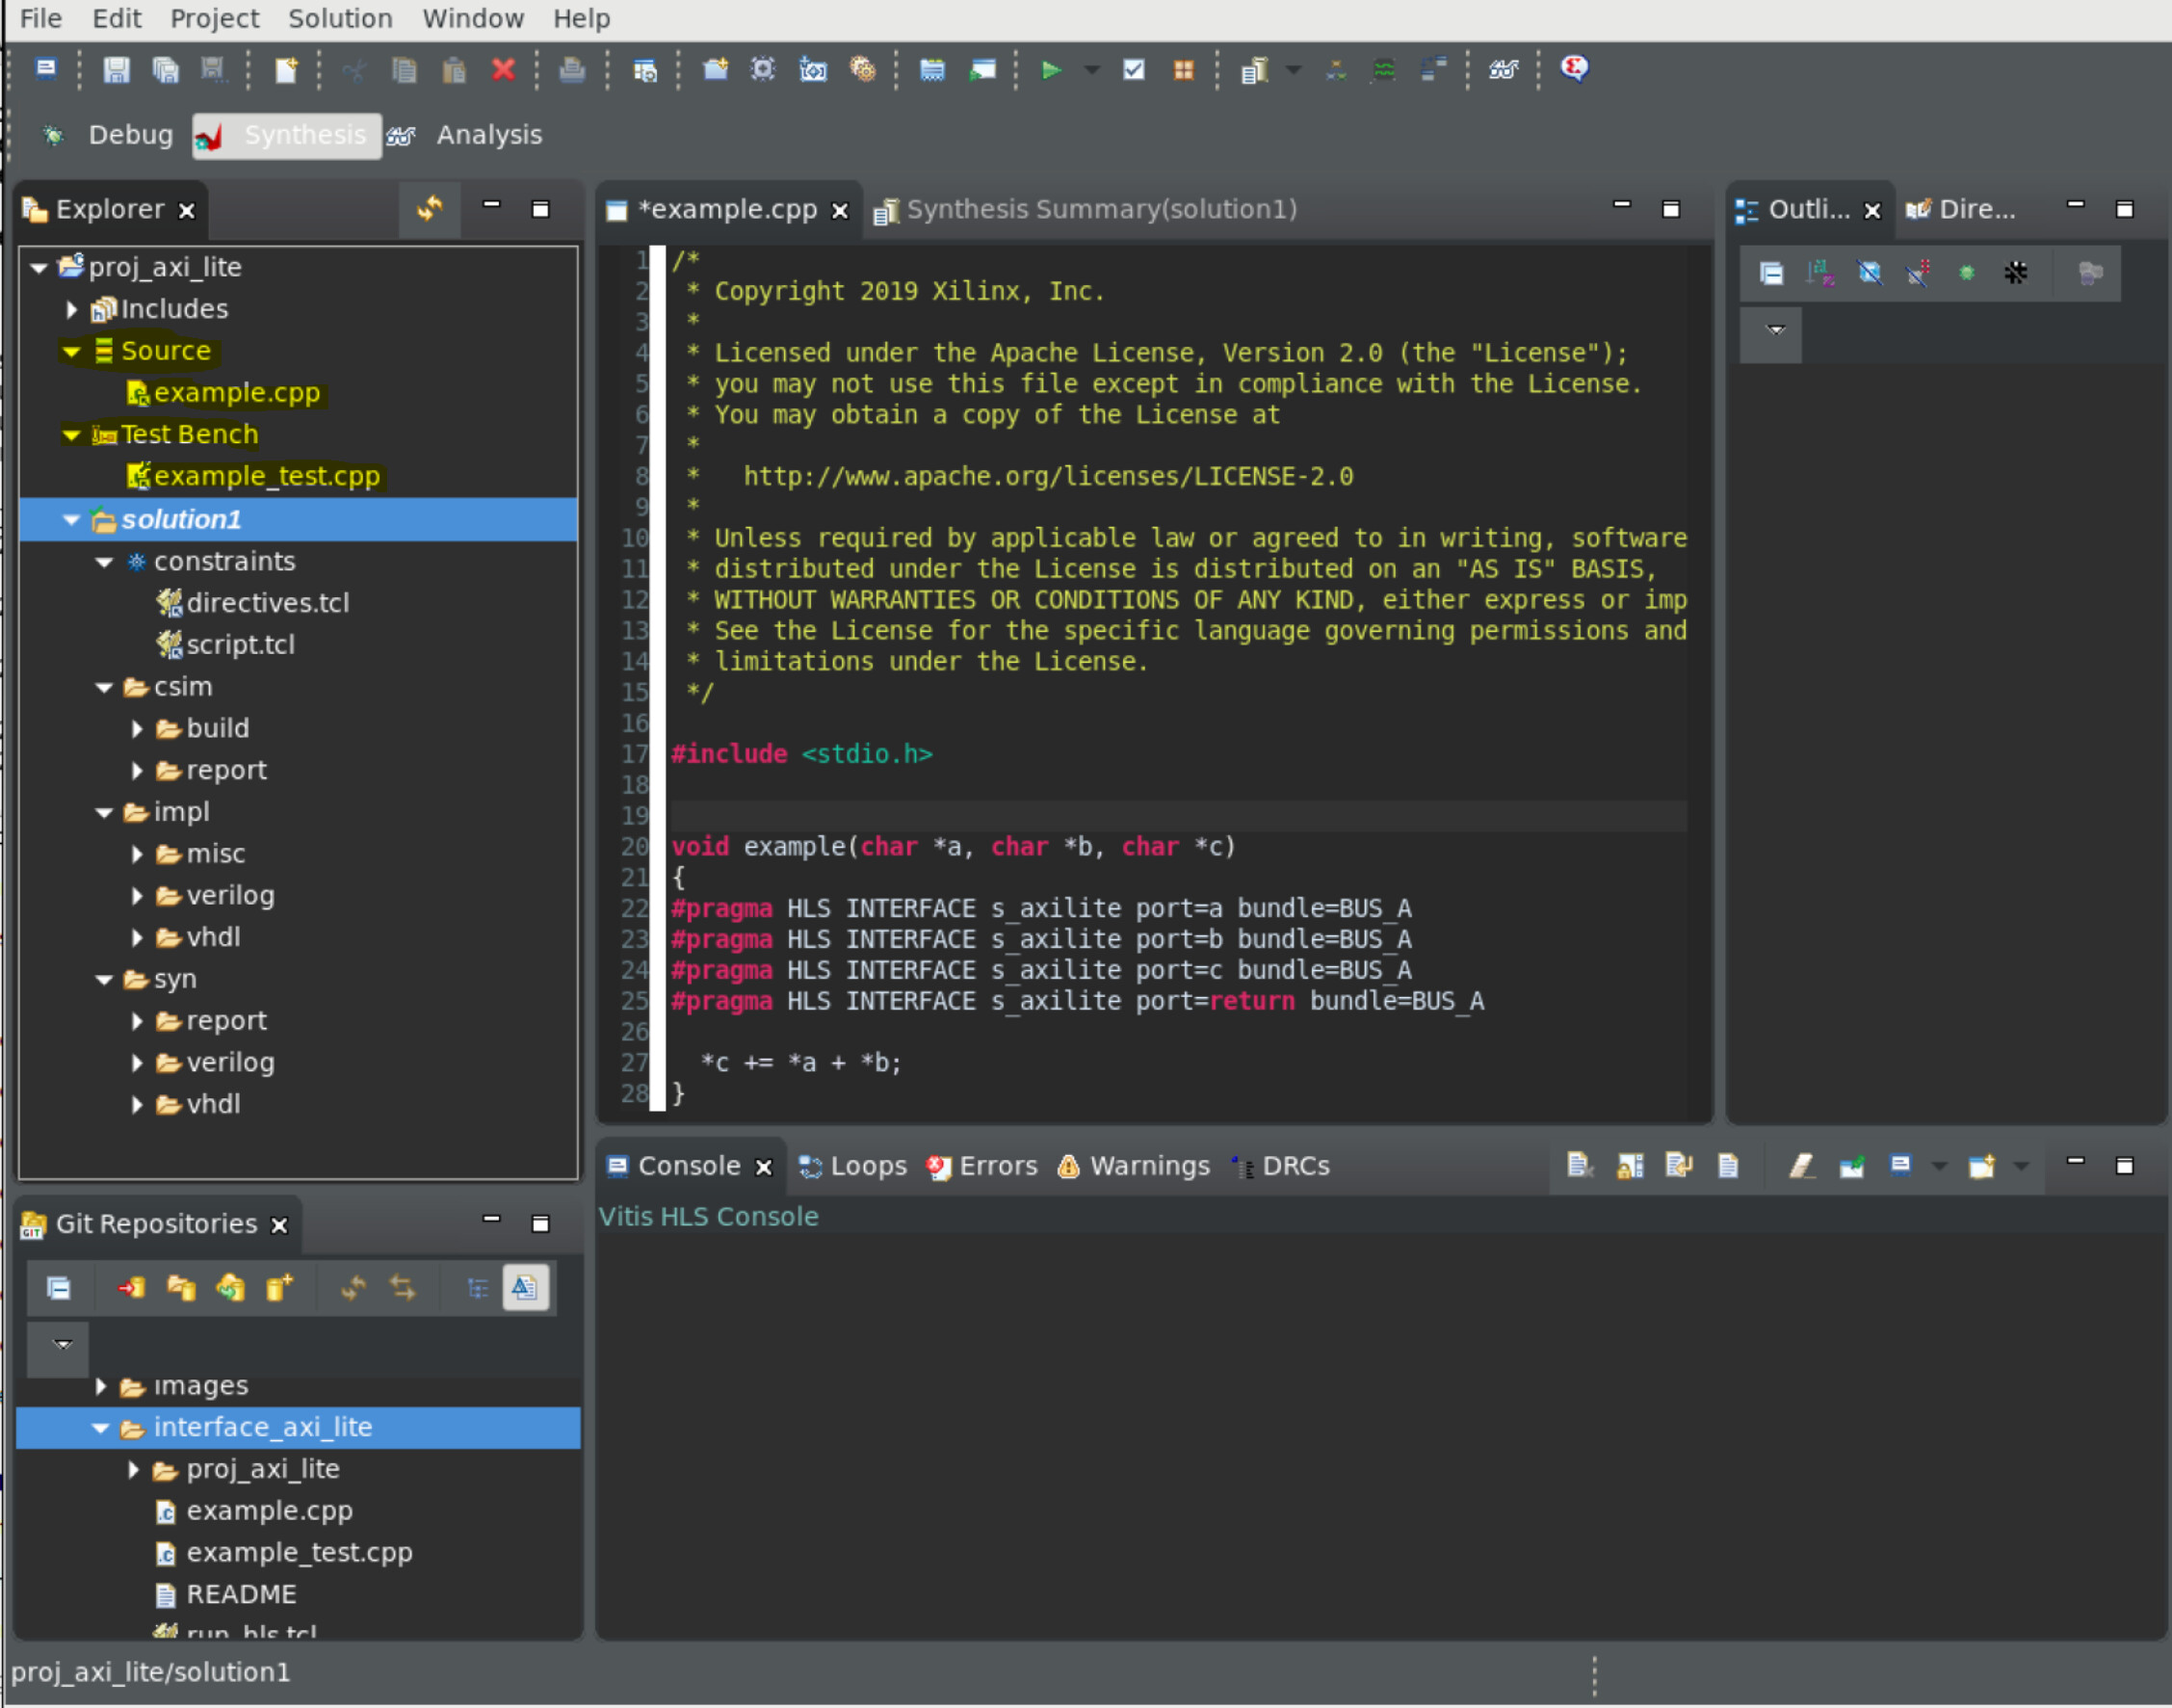
- Once finished, the project should be opened in the top left-hand tab. Double-click example.cpp and example_test.cpp to view the source code and testbench.
Understanding the Source Code
The example consists of two key files:
Example.cpp – This is the code that will be synthesized into RTL in order to create the IP seen in the Introduction. This IP will be combined with other IP in the Vivado Design Suite, and eventually placed on your hardware.
Example_test.cpp – This is the testbench we will use to make sure example.cpp works as expected. Example.cpp’s algorithm is checked by comparing its output to a ‘golden data’ calculation done in the testbench. A testbench in HLS should always return 0 if the golden data matches the returned result of example.cpp.
If you select example.cpp (under Source in the left-hand column), the source code will open. Let’s take a look at it in more detail:
Function Arguments
void example(char *a, char *b, char *c)
The first thing you will see after the library entry, is the function example();. If you are familiar with C based design, you will know that all input and output operations are performed, in zero time, through formal function arguments (such as char *a, char b and charc in the example above).
In an RTL design, data is moved in and out of IPs via ‘ports’. These ports can operate using specific I/O protocols (such as AXI-lite, AXI4-Stream etc.) in order to standardize communication between IP blocks.
Each piece of data we want to send in or out of our IP should be specified as a separate function argument in our main source file. It will later be synthesized into a ‘port’ in hardware (RTL).
Note: Ports can actually be created via three different methods, but the focus of this tutorial will be via function arguments.
Ports can be derived from:
- Any function-level protocol that is specified.
- Function arguments.
- Global variables accessed by the top-level function and defined outside its scope.
Note: Because the variables in an AXI-Lite interface are function arguments, they cannot be assigned a default value in the C code. Therefore, none of the registers in an AXI-Lite interface can be assigned a default value. The registers can be implemented with a reset with the config_rtl command, but they cannot be assigned any other default value. ( Please see Controlling the Reset Behavior for details*).*
Interface Pragma
On the next lines we see our pragma interfaces.
Let’s break down each component of it:
#pragma HLS INTERFACE s_axilite port=a bundle=BUS_A #pragma HLS INTERFACE s_axilite port=b bundle=BUS_A #pragma HLS INTERFACE s_axilite port=c bundle=BUS_A #pragma HLS INTERFACE s_axilite port=return bundle=BUS_A
We need to define the inputs/outputs of our IP as s_axilite, in order to use the AXI-Lite protocol. If this line was not in our code, the data inputs/outputs would be synthesised into basic wires and would have no associated handshaking signals. In this situation, the input would have to be held stable until it was read, which if done carelessly could lead to errors.
The interface pragma is in the following format:
#pragma HLS interface port= (register) bundle=
Where:
: Specifies the interface protocol mode for the function arguments. In this case we chose s_axilite.
port= Specifies the name of the function argument which the INTERFACE pragma applies to.
(register): Is an optional keyword to register (i.e. store) the signal and any associated protocol signals. It causes the signals to persist until at least the last cycle of the function execution. This option is not applicable to axilite.
bundle=: This keyword allows you to manually group the port signals into one data bus. If the function return is specified as an AXI4-Lite interface (i.e. line 25 in the example code), all of the data ports are automatically bundled into a single bus. Vitis HLS would use the default bundle name control, if we did not explicitly provide a bundle name here. This is a common practice when another device, such as a CPU, is used to configure and control when the block starts and stops operation.
s_axilite port=return: Setting a function argument of type s_axilite and port name ‘return’ will create an interrupt signal in the IP block. You can program the interrupt through the AXI4-Lite interface, and the C driver files. More information can be found here.
Note: If any top-level function argument is specified as an AXI4-Lite interface, the function return must also be specified as an AXI4-Lite interface.
Note 2: By default, Vitis HLS automatically assigns the address for each port that is grouped into an AXI4-Lite interface. Vitis HLS provides the assigned addresses in the C Driver Files. To explicitly define the address, you can use the offset option. In an AXI4-Lite interface, Vitis HLS reserves addresses 0x0000 through 0x000C for the block-level I/O protocol signals and interrupt controls.
Function Body
*c += *a + *b;
In the function, we define exactly what we want our IP to do. In this case, our IP will take in two values (a and b) and store the result (c ) in a register. In order to test the functionality, our testbench will give the example() function values for a and b, and compare it to its own calculated values for a+b. If the results match, the testbench should always return 0, and c simulation should pass.
In the next article of the AXI Basics Series we will learn how to export our IP into the Vivado Design Suite, so we can connect it to other IPs, or the PS, via the AXI Lite interface.
Other AXI Tutorials
The other tutorials in the series are available below:
| Link | Description |
|---|---|
| AXI Basics 1 - Introduction to AXI | This blog entry will cover some of the basics of AXI3/AXI4 on Xilinx devices. First we will start with the less exciting parts, the theory and the terminology. |
| AXI-Basics-2-Simulating-AXI-interfaces-with-the-AXI-Verification | The Xilinx AXI Verification IP (AXI VIP) is an IP which allows the users to simulate AXI4 and AXI4-Lite. It can also be used as a AXI protocol checker. |
| AXI-Basics-3-Master-AXI4-Lite-simulation-with-the-AXI-VIP | In this new entry we will see how we can add an AXI VIP into a Vivado project to simulate an AXI4-Lite interface. We will then look at the signals used for AXI4-Lite transactions in the simulation waveform window. |
| AXI-Basics-4-Using-the-AXI-VIP-as-protocol-checker-for-an-AXI4-Master-Interface | In this article we will see how we can use it to validate (and find errors) in an AXI4 (Full) Master interface. |
| AXI-Basics-5-Create-an-AXI4-Lite-Sniffer-IP-to-use-in-Xilinx-Vivado-IP-Integrator | In this article I will show you how to create a basic AXI4-Lite sniffer IP which will count the read/write transactions happening at a specific address. |
| [AXI Basics 6 - Introduction to AXI4-Lite in Vitis HLS | |
| ](https://support.xilinx.com/s/article/1137153) | In this article we will explore the basics of how to create a custom IP with an AXI4-Lite interface in Vitis HLS. |
| AXI Basics 7 - Connecting to the PS using AXI4-Lite and Vitis HLS | In this article, we will learn how to export our IP so that we can use it in the Vivado Design Suite, and how to connect it to other IP cores and a processor. |